
2026/10/16
How to upscale AI-generated video to 4K with FlashVSR
Choose a usable AI video clip, compare detail in existing FlashVSR demos, and plan a short 4K test before spending credits on a longer export.
A generated clip can look convincing in a small preview and soft in your final edit. Before spending credits on a 4K version, watch the source at normal speed. If the face changes halfway through or a hand bends incorrectly, choose another take. Those problems need attention before resolution does.
For a usable MP4, the FlashVSR workflow is straightforward: upload the clip, choose 4K, check its credit estimate, and process it. The part that needs care is judging what changed.
What a sharper frame actually shows
Take this snow leopard pair from the site's existing demo library. Compare the whiskers and the fur around the cheeks. Then look away from the animal and inspect the rock beneath it.

Original demo frame.

Enhanced demo frame. This pair comes from the existing FlashVSR showcase. It is not a new benchmark, and it does not establish the source video generator or the settings used to produce the result.
The enhanced frame has more distinct edges and texture. The distant mountain remains soft. That matters: you do not necessarily want every part of a shot to become equally sharp. An out-of-focus background may be part of the composition.
These web images are resized previews. Use them to see what to inspect, not to judge a native 4K export. You can also open the existing original demo video and enhanced demo video to examine motion.
Export the clip you intend to keep
Download the best available source file from your video generator. If the format is not MP4, export an MP4 in your editor. Avoid passing the file through a social app before upscaling it.
Trim away unused footage first. For a sequence with several takes, pick the take before paying to process it. If only four seconds survive the edit, there is little reason to enhance all the rejected material alongside it.
For the first test, export a short section that includes the hardest part of the shot. In a portrait that may be a head turn. In a moving camera shot it may be a fence, grass, or lettering passing through the frame. Testing only an easy, still moment tells you less about the final sequence.
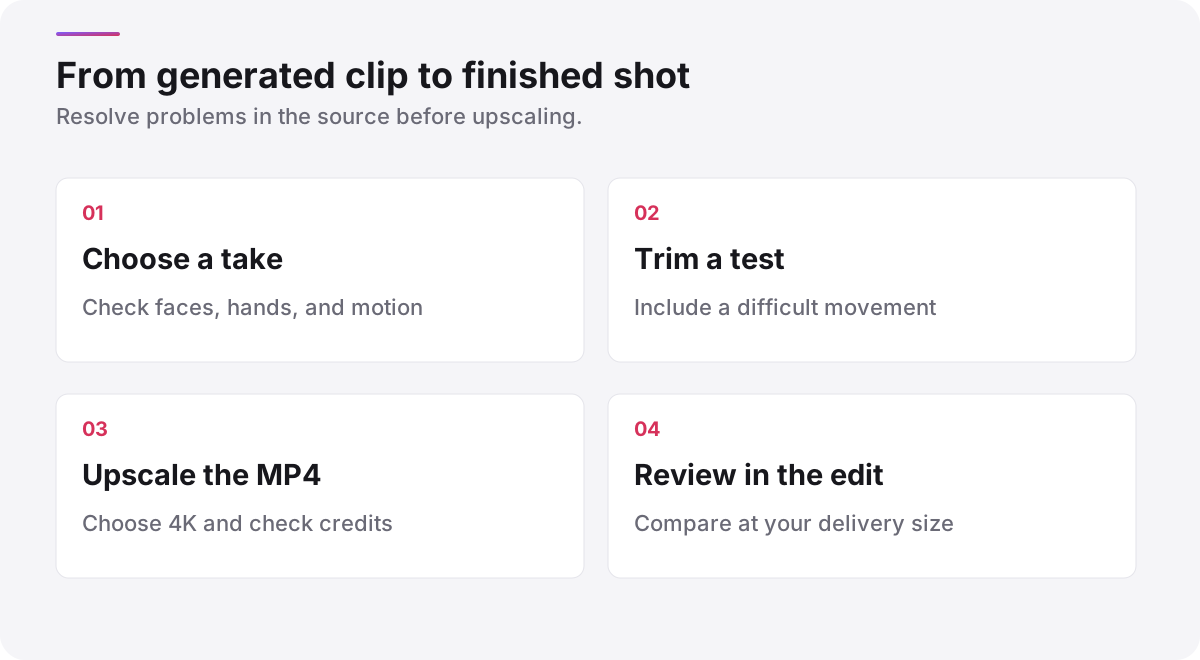
Prepare the short test in your editor before uploading it.
Set 4K and check the cost
In the video upscaler, upload the MP4 and select 4K. This is a prompt-free workflow. Wait for the upload to finish so the estimate reflects your file.
At the rate checked on October 16, 2026, 4K output costs 13 credits per second. A 5-second clip costs 65 credits. Duration rounds up to whole seconds, with a 3-second minimum, so even a shorter test costs at least 39 credits at 4K.
The signup gift is 8 credits and does not cover that run. Check your balance before processing. If you need help with the controls or lower-resolution pricing, use the FlashVSR online tutorial.
Review the output inside your edit
Download the completed result and put it beside the source in your editor. Keep the framing and display size the same. Otherwise, a larger preview can make the comparison misleading.
Start with normal playback. Does the shot still feel natural? Then pause on the same moment in each version. Check the area that motivated the upscale, whether that was a soft face, a jacket texture, or distant architecture.
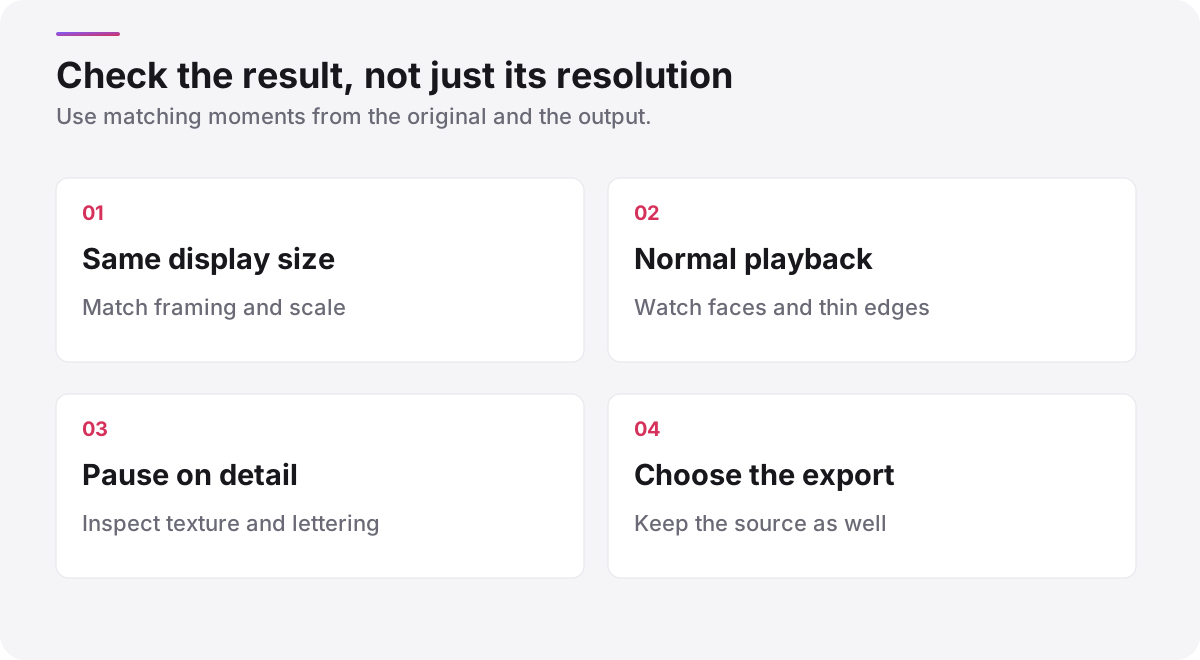
Fine patterns deserve another pass in motion. If fur, grass, or small lettering changes shape from frame to frame, decide whether the added sharpness is worth that distraction. Review the result at the size your audience will see, as well as at full resolution.
Keep the source and the output until the edit is approved. If the result works for the test section, process the chosen clip at the same resolution. If it introduces distracting texture, retain the source or compare a lower-resolution output before committing more credits.
Author
Categories
More Posts
Practical tutorials
How to use FlashVSR online: upload, upscale, and download
Prepare an MP4, choose an output resolution, and check the credit cost before using FlashVSR. Includes demo frames and a practical review checklist.

Practical tutorials
Plan a three-shot café film before you generate the video
A concrete shot list for a rainy café scene, with identity anchors, motion prompts, continuity checks, and a restrained finishing workflow.
Practical tutorials
Nano Banana 2.1 for video creators: start with better reference frames
How to use an image-model update in a video workflow, from reference-frame review to motion tests and final video upscaling.